It supposed to be a post about spring cleaning of feathers, a definition borrowed from some novel describing woman's wish to look good time after time. But as is a war in Ukraine, the process of creating this post's content transformed into the mean of distracting from the news stream at least for some time. Of course, the idea of feathers dictated by the nice print pattern of the fabric used to sew this garment. I liked it so much that I couldn't but yield the temptation to buy it despite black colour is far from my favourites.
Прилягаюча трикотажна сукня, або Весняне Пір'ячко
Цей допис планувався як розповідь про весняну "чистку пір'ячка", означення запозичене з якогось роману для опису бажання жінки час від часу добре виглядати. Але через те, що в Україні війна, процес створення змісту перетворився в засіб відволіктися, хоч ненадовго, від стрічки новин. Звісно, що тема пір'ячка продиктована гарним візерунком тканини з якої пошите це вбрання. Він мені так сподобався, що я не змогла не поступитися спокусі придбати матеріал, хоча чорний колір далекий від того, щоб бути моїм улюбленцем.
If to forget that the dress was cut before New Year's Day, the making itself is not hard and quite quick, a day was enough. The model is PDF pattern Burda #6562. The dress has really great fitting so can be done only of jersey. If the jersey is thin, I prefer synthetic fabric of good quality as it is not too stretching and keeps the shape well.
Виготовлення сукні не складне і, якщо знехтувати фактом її покроєння ще до Нового року, доволі швидке - вклалася за день. Модель PDF Burda 6562. Сукня справді прилягаюча і має шитися лише з трикотажу. У випадку роботи з тонким трикотажем, я надаю перевагу синтетичному матеріалу гарної якості, оскільки він не дуже тягнеться і добре тримає форму.
All the process was by the instruction with the only change. As the garment made of synthetic fabric, it certainly needed a good lining for comfort wearing. I chose dense viscose and was brave enough to cut the lining by the dress' draft despite I've just told the outfit is fitting :-) To avoid any kind of fastening in the lining, I cut it a little bigger along all the edges. The trick worked.
Весь процес був за інструкцією з єдиною зміною. Оскільки сукня з синтетичної тканини, вона напевно потребувала гарної підкладки для комфортного носіння. Я обрала щільну віскозу і доволі хоробро покроїла підкладку за основною викрійкою сукні, хоча щойно було сказано, що сукня дуже прилягаюча:-) Щоб уникнути будь яких застібок на підкладці, покроїла її трохи більшою по всіх краях. Прийомчик спрацював.
This time the neck hole was processed as in the instruction, in the way typical for knitwear.
Цього разу горловину обробила теж за інструкцією, в типовий для трикотажних речей спосіб.
I don't know when I am able to wear this dress but I am sure that the our spring comes anyway.
Necklaces Golden Dust I and Golden Dust II, the stole is quite old but still looks good and adds bohemian note to the image :-)
Не знаю, коли зможу одягнути цю сукню, але я впевнена, що наша весна обов'язково настане. Намиста "Золотистий пил" І та "Золотистий пил" ІІ. Стола доволі давня, але все ще гарно виглядає і додає богемну ноту до образу :-)
As it was mentioned in the previous post there were two sets of jewellery made of two packs of Preciosa glass pearls. The second of them consists of three items: a pair of earrings, and two necklaces, the short is about 37 cm long and the long one is about 135 cm. I also have an idea and the materials left enough to make at least one more necklace. The dress on the photo will have its own post a little later :-)
Набір прикрас "Золотистий пил" ІІ
Як згадувалося в попередньому дописі, з двох упаковок скляних перлин Preciosa було зроблено два набори прикрас. Другий складається з трьох предметів: пари сережок і двох намист: короткого, довжиною біля 37 см і довгого - біля 135 см. Крім того, у мене є й ідея та достатньо матеріалів щоб зробити принаймні ще одне намисто. Сукня на фото отримає власний допис трохи згодом :-)
The necklaces from both sets can worn together, what I am actually doing, or separately. The earrings can be replaced as well.
Намиста з обох наборів можна носити всі разом, що я і роблю насправді, або окремо. Сережки також можна заміняти.
There was nothing special about yesterday evening but in some mysterious way it inspired me to make two new sets of jewellery. The first of them was finished late at night. It is a dainty, simple, and universal set consisting of a delicate necklace and a pair of dangle earrings.
Набір прикрас "Золотистий пил" (І)
Вчорашній вечір не був особливим жодним чином, але у якійсь загадковий спосіб він мене надихнув на створення двох нових наборів прикрас. Перший з них закінчила пізно вночі. Це простий, елегантний і дуже універсальний комплект з делікатного намиста та сережок з підвісками.
All of the items are made of the Preciosa beige glass pearls mix which I had two packs. To those pearls I added 4х6 mm crystal rondelles of the same hue and 10.0 Czech seed beads.
Всі складові комплекту були зроблені з суміші бежевих перлів Preciosa, яких у мене було дві упаковки. До тих перлин додала кришталеві ронделі 4х6 мм такого ж відтінку і чеський бісер №10.0.
It is not the first thematical February trifle I have ever made but it is exactly the first and the only one of the kind :-) Last Sunday I had a birthday and got this nice and practical cup as one of the gifts. Today, having a stable wish to make something, I decided I was inspired enough to make this quick and simple project which would put me in a good mood as a sunny day succeeds in it in winter, for example :-) Numberless cup cozies in the Internet made me always doubt if people really use them. Right now I am sure I will take this cute piece every time when planning drinking coffee outdoors either at home or during walks :-)
Утеплювач для чашки
Не знаю поки що, як це назвати українською мовою, щоб звучало затишно, тож наразі "утеплювач/зігрівач":-) Це не перша тематична лютнева дрібничка, яку я колись робила, але вже точно перша і єдина в своєму роді:-) Минулої неділі у мене був день народження і одним з подарунків була ця мила практична чашка. Сьогодні, маючи непереборне бажання щось зробити, я подумала, що у мене вистачить наснаги на цей простий і швидкий проект, який створить гарний настрій, як, наприклад, це вдається сонячному дню взимку:-) Численні утеплювачі/зігрівачі в Інтернеті завжди примушували мене сумніватися, що люди і справді таким користуються. Зараз я впевнена, що братиму з собою цю дрібничку щоразу, коли збиратимуся пити каву надворі або під час прогулянок:-)
I only crocheted a stripe of leftover yarn. The hearts and roses were in my stash as I used to make them to decorate an outdoor sphere. The link to make to crochet hearts I have but what tutorial was used to make the flowers, I don't remember. There are a lot in the Internet to choose.
Сплела гачком лише смужку з рештків пряжі. Сердечка і троянди у мене залишалися з часів декорування вуличної кульки. Посилання на плетіння сердечок у мене є, а ось за яким майстер класом плела квіточки, не пам'ятаю, в Інтернеті є багато з чого обрати.
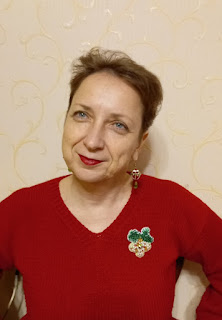
The last brooch made as a present this year is this Iris Brooch. It is very decorative and ornate, and seems to belong to a baroque style:-) A burst of colour among winter that cannot but attract attention. I liked it because of plenty of both light and dark as well as matte and shining lilac hues, and variety of the used materials including 15.0 seed beads, twin, and pip beads. The rhinestone chain adds it delicacy. My friend chose it herself and it is clear she wasn't mistaken :-). The brooch is very beautiful indeed!
Брошка "Ірис"
Остання брошка створена в подарунок цього року - цей "Ірис". Вона дуже декоративна і нарядна, здається належить до стилю бароко:-) Вибух кольору серед зими який не може не привернути увагу. Мені вона сподобалася через велику кількість світлих і темних, матових і сяючих бузкових відтінків, а ще розмаїттям використаних матеріалів включно з бісером №15, твінами та "pip" намистинами. Ланцюжок зі стразами додає виробу витонченості. Моя подруга сама її обрала і, як бачимо, не помилилася:-) Брошка справді дуже гарна!
The main trouble here was a lot of work with French wires and the piece of it made me think it would be not enough for all those petals' curves so it was stretched more than I had done it before. The outcome is worth of those efforts:-)
Головною проблемою тут було багато роботи з канителлю її відрізок якось примушував думати, що її буде не достатньо для вигинів усіх цих пелюсток тож довелося розтягувати її більше ніж робила це раніше. Результат вартий тих зусиль:-)
I've embroidered quite a lot of brooches to have favourites. This one is undoubtedly one of them and it is fabulous indeed by its colour style, materials, and design, of course. There are 19 kinds of materials including seed beads 15.0, the proper needle is in the kit as well. As soon as I came across this Orchid, I knew it would be made for my friend who is a great fan of these flowers and has been growing them for many years. Besides, what is very important when one gives handmade presents, she also enjoys wearing my brooches :-)
Брошка "Орхідея"
Вишила я брошок достатньо, щоб мати улюблениць. Без сумніву ця - одна з них і вона надзвичайно гарна і cвоєю кольоровою гамою і за підібраними матеріалами і, звісно ж, за дизайном. Матеріалів багато, 19 видів. В наборі є мілкий бісер, №15, тут також можна "Чарівну мить" похвалити, адже і тоненькою голкою відповідно до цього бісеру забезпечили. Щойно я на цю "Орхідею" натрапила, знала, що зроблю її для своєї подруги, яка є фанатом цих квітів і вирощує їх багато років. Крім того, що дуже важливо, коли даруєш власноруч зроблені подарунки, їй також подобається носити мої брошки :-)
As there are a lot of very different materials, the embroidering took me two evenings but the outcome is magic:-)
Оскільки матеріалів багато, на вишивання пішло два вечори, але результат - казковий:-)
After decorating Christmas tree, it is the very time to decorate myself a little:-) To make this Ornament Brooch seemed to be a nice idea to do that. My expectations were not deceived as the brooch is bright, sparkling, and looks entirely in tune with the season. It also matches well my Festive earrings which are worn quite actively all the year round.
Брошка "Різдвяна прикраса"
Нарядивши різдвяну ялинку, настає саме час трохи прикрасити і себе:-) Зробити цю брошку "Прикрасу" видалося для цього вдалою ідеєю. Мої очікування були виправдані, оскільки брошка виявилася яскравою, сяючою і цілком у фарватері свята. Також вона гарно пасує до моїх "Cвяткових сережок", які активно носяться круглий рік.
The brooch contains 17 kinds of materials, thus it is the richest among all those ones made by Charivna Myt kits. Unfortunately, I spoiled one of them, a short piece of soft french wires which I used first time here and failed, so replaced it with a piece of the stiff. I also added more seed beads to embroider the tree branches. For the final processing of the edges at first wanted to use two colours of seed beads, yellow for the ornament and green for the tree, but then changed my mind as green seed beads are very bright so would dominate too much.
Брошка налічує 17 видів матеріалів, тож це найбагатша з усіх, які зроблені за наборами від "Чарівної миті". На жаль, один з них, маленький відрізок м'якої канителі, який мені трапився вперше і безуспішно, я зіпсувала, тож замінила його на відрізок жорсткої. Також додала більше бісерин для вишивки гілочок. Для кінцевої обробки країв спочатку хотіла використати два кольори бісеру: жовтий для прикраси і зелений для дерева, але потім передумала, оскільки зелений бісер дуже яскравий і став би занадто домінуючим.
If to dig very deep into our Ukrainian mythology, one can learn that the calendar of winter holidays starts here on December 4 but I have no idea if anybody really keeps the ancient tradition. So mostly we start celebrations from St. Nicholas day, December 19, when in the morning kids of all ages find presents from the saint under their pillows. I still come upon, too, a couple of oranges but in my boots mainly:-) This year I also decided I want my Christmas tree earlier and invited my cousin with her family to decorate and celebrate. The time passed quickly and pleasantly. For my cousin I prepared a small present, this Titmouse Brooch made by a kit from Charivna Myt.
Брошка "Синичка"
Якщо глибоко копатися в нашій український міфології, то можна дізнатися, що календар зимових свят тут починається 4 грудня, але насправді я не маю жодного уявлення чи хтось дотримується такої стародавньої традиції. Тож переважно ми починаємо святкування з дня Св. Миколая, 19 грудня, коли вранці діти будь якого віку знаходять під подушкою дарунки від святого. Я теж все ще відшукую пару апельсинів, але, здебільшого, в чоботах:-) Крім того, цього року я вирішила, що хочу раніше встановити ялинку і запросила мою сестру з родиною прикрашати і святкувати. Час минув швидко і приємно. Для сестри я приготувала маленький подарунок, цю брошку "Синичка", зроблену з набору від "Чарівної миті".
There is no much to tell about the process of work as I just followed the chart which is included into the kit. There is only one note: two kinds of materials were entangled but that wasn't a problem. I enjoyed both the process of making and the outcome.
Про процес виготовлення особливо немає чого розповідати, все робила за схемою. Єдине зауваження: два види матеріалів були переплутані, але це не стало проблемою. Мені сподобався і процес роботи і результат.
The story is that yesterday evening I was going to string a necklace to match a new dress I cut last Saturday. When I took my beading board, which is actually a wooden tray covered with a piece of coat fabric, it was full of the materials left from Cranberry with Sugar Necklace. I didn't sort them on their places as had to make a pair of earrings to match the necklace but forgot about that. So to start a new project, I had to make these pair of earrings quickly to clean the board.
Сережки "Журавлина з цукром"
Історія така. Вчора ввечері я збиралася нанизати намисто до нової сукні покроєної минулих вихідних. Але, коли витягла мою робочу дошку, яка фактично є підносом накритим клаптем пальтової тканини, виявилося що на на ній повно матеріалів, які залишилися від намиста "Журавлина з цукром". По місцях я їх не розсортувала, оскільки мала зробити сережки до намиста, але забула про це. Тож, щоб розпочати новий проект, довелося швиденько зробити цю пару сережок, щоб розчистити робоче місце.
The earrings from the tutorial were not my cup of tea, so I decided to make something simple and quick using the necklace's materials. Rivoli 14 mm, delica seed beads 10.0, toho 15.0 and 6 mm Czech pearls.
Сережки з майстер класу мене не дуже привабили, тож вирішила зробити щось просте і швидке з матеріалів намиста. Ріволі 14 мм, бісер деліка 10.0 і тохо 15.0, чеські перлини 6 мм.
First time I made a short coat, or as we say here a "half-coat", about 15 years ago and since then it is my third item of the kind. For me, it is a quite comfortable and much worn mid-season garment in our South Ukraine's climate. Besides, if to judge by how much I was wearing the previous half-coat, it is also indispensable piece of clothes for those who enjoy travel around the country in autumn or spring when it is about 5-10 Celsius degrees above zero. I also remember me in Kyiv having it on when it suddenly snowed and I wasn't cold. So, as my friend said, it is obvious why we haven't gone anywhere this autumn: it is because I only finished this new apparel a week or two ago and the pandemic is not the reason at all:-)
Блакитне напівпальто з паском
Вперше я пошила коротке пальто років 15 тому і з того часу це вже мій третій виріб такого типу. Для мене це доволі зручний вид одягу, який я часто одягаю в міжсезоння в нашому південноукраїнському кліматі. Крім того, якщо судити по тому скільки і як носила своє попереднє напівпальто, це незамінний предмет гардеробу для тих, хто любить подорожувати країною восени або навесні, коли надворі +5...+10 градусів. Також пригадую себе у Києві, одягнутою в подібне вбрання, коли раптом випав сніг і я теж не змерзла. Тож, як каже моя подруга, цілком очевидно, чому ми нікуди не поїхали цієї осені: саме тому, що я закінчила цей новий виріб лише тиждень-два тому, а пандемія тут геть ні до чого :-)
The photos of the earlier coats were saved because in those times I knitted a lot and shared the sweater, scarf and the hat on Ravelry.
Фото попередніх пальт збереглися, тому що тоді я багато плела і розмістила светр, шарф і шапку на Ravelry.
This time for sewing a half-coat, I chose model #108 from Burda 10/2018, or Burda PDF #6290. I lengthened the jacket for 20 cm, it was easy to make correct lines because #107 is a coat made by the same pattern. I also changed the type of the pockets because my fabric is stiff and dense and I wanted to avoid the extra thickness of the few fabric layers at the waist.
Цього разу для пошиття напівпальта я обрала модель 108 з Burda 10/2018, або Burda PDF #6290. Я подовжила модель жакета на 20 см, правильні лінії було легко зробити оскільки модель 107 - це пальто за тією самою викрійкою. Також я змінила тип кишень, оскільки моя тканина жорстка і щільна, я хотіла уникнути додаткової товщини декількох шарів тканини біля талії.
The sewing of any coat starts with the defining the direction of the fabric's pile.
To get new pockets I cut the paper pattern by the pocket's line. And thus got two parts of the centre front.
Пошиття будь якого пальта починається з визначення напрямку ворсу тканини.
Щоб отримати нові кишені, я розрізала викрійку по лінії кишені і так отримала дві частини середини пілочки.
Processing of the flaps.
All the coat's seams except the side, were top stitched.
Обробка клапанів.
Всі шви пальта, крім бокових були відстрочені.
The front pocket pouch (cut from the lining fabric) also plays the role of the facing here.
Передня частина мішковини кишені також грає тут роль обшивки.
The arrangement of the flap.
Розташування клапана.
Joining the front parts.
З'єднання частин переду.
The back pocket pouch plays the role of the back facing at the same time time. Before joining the pouch details, the triangles in the corners must be stitched.
Задня частина мішковини кишені водночас грає роль підзору. Перед зшиванням мішковини треба прострочити трикутнички у кутках.
Stitching the pouch.
Зшивання мішковини.
The back must be reinforced along the neckhole, shoulders and armholes. It is very desirable to press all the bulging at once as in the ready coat, it would be more troubling to do.
Спинку треба зміцнити уздовж горловини, плечей та пройм. Всі здуття бажано зпрасувати одразу, тому що в готовому пальті це буде зробити важче.
The front edges were slightly gathered and reinforced with the special stripe to avoid the opening their opening while further wearing of the coat.
Краї борту було трохи призібрано і зміцнено спеціальною стрічкою, щоб уникнути відкривання пілочек підчас подальшого носіння пальта.
To make the edges of the front thinner, before their stitching they were pressed open.
Щоб краї борту були тонші, перед відстрочуванням їх варто розпрасувати.
Before joining the lining, the collar's seam of the coat and the facing were sewed together.
До пришивання підкладки припуски на шви коміру жакета та обшивки були зшиті разом.
After joining the lining along the inner edges of the facing and sleeves' hem, the details were connected with bars.
Після пришивання підкладки до внутрішніх зрізів підборту та низу рукавів, деталі були скріплені поперечними закріпками.
The coat is fasten with plastic clasps. I also made a short belt with a covered fabric buckle.
Пальто застібається на пластикові кнопки. Також я зробила короткий пасок з обтягнутою тканиною пряжкою.
To cover a buckle with a fabric was my ancient intention postponed few times. But for this coat I couldn't refuse the idea to make it and looked through several YouTube's video in the search of a good tutorial. Some of them were absolutely helpful if to talk about the common basis of the process of wrapping. But there still was some space for the work's improvement.
Обтягнута тканиною пряжка до паска
Обтягнути пряжку тканиною було моїм стародавнім наміром, який відкладався вже декілька разів. Проте, для цього пальта я вже не змогла відмовитися від ідеї і переглянула декілька відео на YouTube у пошуках гарного майстер класу. Деякі з них і справді абсолютно корисні, якщо говорити про загальний принцип процесу обтягування. Але простір для вдосконалення залишався.
I won't analyse the videos I have seen because learning is an individual process and the same methods work in different way for different people. I only must mention that there are two kinds of buckles to cover with fabric. The first are those buckles meant to be covered. It means they consist of two parts and the process of wrapping is quite quick and easy for a crafty person. The second type is a usual buckle which we have in stash or buy in the a hobby store and must invent how to make it look neat and stay functional at the same time. This latter is my case. My main recommendation is to use durable but thin fabric for underneath part. I reinforced a piece of synthetic lining fabric. Then it would be much easier to sew the coat fabric edges and the ready item will look more delicate.
Не буду аналізувати відео, які я переглянула, тому що навчання процес індивідуальний і одні і ті самі методи працюють по-різному для різних людей. Повинна лише сказати, що є два типи пряжок для обтягування. Перший - той, який для цього призначений, пряжка складається з двох частин і її обтягування простий і швидкий процес для рукотворниці. Другий - звичайна пряжка, яка є в запасах або куплена в крамниці і треба ще поміркувати, як її примусити і виглядати охайно і залишатися функціональною. Це останнє - мій випадок. Моя головна рекомендація - використовувати для нижньої частини міцну, але тонку тканину. Я зміцнила клаптик синтетичної підкладки. Тоді зшивати краї пальтової тканини буде легше і готовий виріб виглядатиме делікатніше.
The belt in the pattern is 5 cm but mine is 4.5 according to the width of the buckle.
Пасок по моделі 5 см, але у мене 4.5 відповідно до ширини пряжки.
I also had to install eyelets without any special instruments to fasten the belt. I learned how to make it from this video.
Також треба було без жодних спеціальних інструментів встановити люверси, щоб застібати пасок. Цього я навчилася по цьому відео.
The necklace is ready and the outcome can't but make me joyful :-) I am also glad that it does match my last festive gown as choosing the colourstyle of the necessary beads for this piece of jewellery, I had that outfit on my mind. One more reason to be in a good mood is that the necklace is ready earlier than New Year's countdown starts :-)
Намисто "Журавлина з цукром"
Намисто готове і не можу не потішитися результатом:-) Також приємно, що намисто добре пасує до мого останнього вечірнього вбрання, оскільки обираючи необхідні намистини для цієї прикраси, я уявляла саме цю сукню. Ще одна причина для гарного настрою: намисто готове раніше ніж годинник починає бити дванадцяту Новорічної ночі:-)
The process of sewing all the elements together took me the whole day yesterday and it only goes about the final part. The previous step, making a bail and joining the rivolis and cabochon, happened a couple weeks ago. This kind of bail was, in fact, the only element in this necklace which I had never done before. I had some prejudice as for it but, after all, the designer was right with this choice and it looks well here.
На процес зшивання всіх елементів до купи пішла вся вчорашня неділя і йдеться лише про фінальну частину. Попередній етап - з'єднання ріволі і кабошона та плетіння бейлу - відбувся пару тижнів тому. Фактично, виготовлення такого бейлу - єдиний елемент в цьому намисті, якого я раніше не робила. У мене було певне упередження щодо нього, але, зрештою, це дизайнерське рішення виявилося вдалим і тут виглядає доречно.
Joining the pipe beads was really time consuming and made me a little upset as some pearls, despite they are of good quality, were harmed. It made me think over their change for gems as it is in the original necklace. At the end I refused the idea as I like what I have a lot and forgot about those pearls' scratches:-)
З'єднання намистин трубочок не лише забрало багато часу а і засмутило мене трохи, оскільки деякі перлини, хоча вони і гарної якості, були пошкоджені. Це мене змусило замислитися про їхню заміну на напівдорогоцінне каміння, як це і є в оригінальному проекті. Проте від ідеї я відмовилася, оскільки мені подобається що у мене вийшло, а про ті подряпини на перлах я і забула:-)