Right after my Christmas tree is disassembled, I think I had more than enough it not to miss its ornaments for quite a long time. But in a couple of months I am already ready to dream about next winter holidays time, don't mind watching a thematical film, and also get inspiration from that. I am glad when this mood implements into something materialistic not only teasing the imagination. For instance, this time I, at last, made a bugle beads rope surely inspired by Christmas tree lights thanking to the used material.
Джгут зі стеклярусу "Ялинка"
Одразу як розбираю свою різдвяну ялинку, завжди впевнена, що мені її було достатньо, щоб не сумувати за її прикрасами доволі довго. Але вже за пару місяців готова мріяти про наступні зимові свята, не проти переглянути якійсь фільм на цю тему та отримати з усього цього натхнення. Також радію, коли цей настрій реалізується у щось матеріальне, а не лише дражнить уяву. Скажімо, цього разу я, нарешті, сплела джгут зі стеклярусу, дизайн якого точно не міг не навіяти думки про святкові вогники на ялинці.
The rope made by sapphirus bead weaving tutorial. I made two samples of different ropes both from the same designer and liked the both a lot but chose the one without incorporated 11.0 seed beads.
Джгут сплетений за майстер класом від sapphirus bead weaving. Я зробила два зразки різних джгутів від того самого дизайнера, обидва мені дуже сподобалися, але обрала той, який без бісеру 11.0.
I haven't done bead weaving for quite long so it was not easy for my eyes to stand few evenings of intensive work. I even had some doubts if I was able to keep on with this craft. Fortunately, after getting this awesome outcome, I realized that I underestimated myself and beading must go on :-)
Набір прикрас "Мерехтлива дрібничка"
Вже давно нічого не плела з бісеру, тож моїм очам нелегко було витримати декілька вечорів інтенсивної роботи. У мене навіть сумніви з'явилися чи зможу і надалі займатися цим видом рукотворів. На щастя, отримавши такий чудовий результат, зрозуміла, що недооцінила себе і плетіння з бісеру має тривати:-)
The used pattern is by Kathy Burke from Beadwork December2012/January 2013. The materials to make it were gathered a couple of years ago.
I didn't think much which of my garments this necklace matches but its colour style size give it many chances to be wearable.
Використана модель Kathy Burke з журналу Beadwork December2012/January 2013. Матеріали для виготовлення були зібрані роки зо два тому.
Я не дуже замислювалася до якого вбрання це намисто пасуватиме, але його кольорова гама і розмір дають йому багато шансів.
The rope is made with spiral herringbone. Its length is about 39-40 cm.
Джгут сплетений перекрученим ндебеле. Довжина десь 39-40 см.
As from the very beginning I was going to make a set, three bigger rivolis were bezelled at once: one for the necklace and two for the earrings.
Оскільки від самого початку планувала зробити набір, більших ріволі було оплетено одразу три: один для намиста і два для сережок.
To decorate ear studs a 3 mm pearl were glued inside it.
Щоб прикрасити швензи, вклеїла перлину 3 мм.
There is a dress on my sewing table. I guess the set will match it not bad:-)
Є у мене на робочому столі сукня, думаю пасуватиме набір до неї непогано:-)
 If I made this lariat in winter, the liana surely would be called "frozen" but as it is 30 degrees above zero outside, it mostly reminds some candy made in a Caramel House so got the name "sugared" :-)
Making lariats are good idea when you want to experiment with different spirals and, especially, their embellishments. This one I made by the sample but couldn't help improvising enough. The initial idea and the pattern belongs to Kelly Wiese.
Ларіат "Зацукрована ліана" :-)
Якби зробила цей ларіат взимку, то ліана вже напевно називалася б " замерзлою", а на вулиці +30 за Цельсієм, то вона більше нагадує якусь цукерку виготовлену у Майстерні Карамелі :-)
Плетіння ларіатів гарний ідея, якщо хочеться поекспериментувати з різними видами джгутів і, особливо, з їхнім декором. Цей я зробила за зразком, але не могла не імпровізувати. Початкова ідея і модель належать Kelly Wiese.
First modification concerned the leaves. I made less rows because I used cut beads and 10.0 seed beads instead of the required so, if following the pattern, the leaves would be very big and awkward.
Перша зміна стосувалася листя. Зробила менше рядочків, оскільки використовувала рубку і бісер 10.0 тому, тому, якщо слідувати інструкції, листя вийшло б дуже великим і недолугим.
Next change was for stamens. Because of the same reason I changed fringe for the corals :-) In this way the stamens look airy and light even made with cut beads.
The length of the desirable connection was defined with a simple arranging of leaves.
Наступна зміна стосувалася тичинок. З тієї ж самої причини замість "китиць" я зробила "корали" :-) Так, навіть зроблені з рубки, тичинки виглядають легкими і граціозними.
Бажану довжину з'єднання визначила простим впорядкуванням листя.
The slide is a real jewel in the pattern but I decided to make it as plain as possible. So used only 10.0 seed beads.
Кільце - справжня прикраса в моделі, але я вирішила зробити як можна непомітнішим, тому сплела з бісеру № 10.0.

And here it is. The shining lariat making think about candies and pleasant days, for example, in Chernivtsi, where the photo of the Caramel House was taken :-)
Ось і він. Блискучий ларіант, що навіює думки про цукерки та приємні дні, наприклад у Чернівцях, де було зроблене фото Майстерні карамелі :-)
As always after finishing complex long term project of my own design my mood swings from "WOW, I have made it!" to "I'll never make it any more, only following the ready patterns next time" :-) There's no need to say that the first idea prevails with passing time and the doubts, remaking and disappointments of the latter are fading out during few days and that's why I'll know when I am ready to start something new. I'd say the common pattern of our life can be described in the same way if the post wasn't related to my beading, doesn't it? :-)
Намисто "Замерзла Лаванда"
Як завжди по закінченні складного довготривалого проекту за власним дизайном мій настрій коливається від "Не можу повірити, що я це зробила!" до "Ніколи в житті такого не робитиму, лише наслідування готових зразків!" :-) Марно казати, що з часом перша думка бере гору, а сумніви, переробки і розчарування другої розсіюються протягом декількох днів і так я дізнаюся, що готова починати щось нове. Я б сказала, що так можна описати загальну модель нашого життя, якби цей допис не стосувався мого бісероплетіння, чи не так? :-)

I wish I could repeat here the same words from the Frozen Lavender earrings post. I mean "If all the details are ready, the only thing to do is to assemble them together" and generally it would be almost true because the final result of any project is the elements composed together but in this case this process took ten days and it was much longer than making the navette components.
At first I drew a sketch of the ready necklace. Then beaded two kinds of ropes: tubular peyote from 10.0 seed beads of three colours and tubular herringbone from cut beads of three colours.
Хотілося б мені повторити тут слова з допису про сережки "Замерзла лаванда", а саме: "Якщо всі деталі готові, єдине, що лишається зробити - зібрати їх до купи". І загалом це було б цілком правильно, бо будь який готовий виріб - це упорядковані і з'єднані разом елементи, але в цьому випадку процес зайняв десять днів і це було набагато довше ніж обплетення наветт.
Спочатку намалювала ескіз готового намиста. Потім сплела два види джгутів: пейоточний з бісеру 10.0 трьох кольорів і ндебеле з рубки трьох кольорів.
And only now almost all the components are ready to be assembled. And it takes the most of time. To sew the bigger navettes to the ropes at first I beaded a short (about two cm) pieces of flat herringbone ropes to the ends of the peyote ropes and then sewed the rivolis to them. Then joined the ropes and sewed the smaller navettes.
І ось лише зараз майже всі елементи готові і їх можна з'єднувати. І на це якраз і витрачається більшість часу. Щоб пришити великі наветти до джгутів, я нанизала коротенькі (десь по два см) відрізки плаского джгута ндебеле до кінців пейточних джгутів і вже до них пришила ріволі. Потім з'єднала самі джгути. І потім пришила менші наветти.

After both peyote and herringbone ropes were joined, it turned out I had to make cones on my own because nothing matched well to cover the ends of the ropes. I beaded two cones by this pattern which I already used for these earrings but with more widening and without petals.
And then it turned out that the bar of the toggle clasp unfastened so I beaded a peyote piece to wrap the bar in it and thus made it a bit bigger. It is seen on the last photo.
Після того як обидва джгути, і пейточний і ндебеле, були з'єднані, з'ясувалося, що мені доведеться самій робити конуси тому що нічого не підходило, щоб приховати кінці джгутів. Тож сплела дві "чашечки" за цією схемою, яку вже колись використовувала для цих сережок, але з більшим розширенням і без пелюсток.
А вже потім виявилося, що тогл розстібається і тому довелося сплести пейотом невеличкий клаптик, щоб загорнути в нього перетику і вона стала більша (це видно на останньому фото).

Although it is said modesty embellishes the person it is not my featured trait because I am quite proud of myself and like my work very much:-)
Хоча і кажуть, що скромність прикрашає людину, але це не моя видатна чеснота, тому що я собою пишаюсь і мені дуже подобається моя робота:-)
That is not a surprise that the embroidering progresses slowly... very slowly... I'd rather say it doesn't progress at all :-)
And it is so just because I do it only when I don't focus on other projects. The other weeks my main one was the necklace to pair the earrings inspired the very picture.
Намисто "Зіркова ніч"
Не дивно, що робота над вишивкою просувається повільно... дуже повільно... а краще сказати, взагалі не просувається :-)
І це лише тому, що я в неї занурююсь лише коли не зосереджена на інших проектах. Останні тижні було присвячено виготовленню намиста в пару до сережок навіяних ідеєю якраз тієї самої картини.

Beading the necklace took me pretty much time not because of the technique, spiral peyote, which I had already used for the Carpathian Path Pendant and Spring Blossoming Temptation Necklace but because I made it really a lot!
I started with bezelling the rivolis, 12 mm and 14 mm. The smaller ones are made exactly like the ones for the earrings. The bigger made with usual technique starting with stringing 36 seed beads.
After that every rivoli was embellished in own way.
The toggle clasp was made by this tutorial.
Нанизування зайняло доволі багато часу не через застосування техніки, пейоточного джгута, який я вже робила для кулону "Карпатський шлях" та намиста "Спокуса весняного цвітіння", а тому що плела я його і справді багато!
Почала з обплетення ріволі, 12 мм і 14 мм. Менші зроблені так само як і для сережок, а більші звичайною технікою з набору в 36 бісерин. Потім кожну ріволі було прикрашено у власний спосіб.
Застібку тогл було зроблено за цим майстер класом.

The rope made from two types of seed beads, 10/0 and cut beads, of the same colour but of five different hues.
Джгут сплетено з двох видів бісеру, 10.0 і рубки, п'яти відтінків одного кольору.
The ready ropes were sewed together in few points. To mark them the necklace should be try on because it looks different on the draft and on the neck. And then the rivoli were sewed to the ropes.
Готові джгути зшила в певних точках. Щоб їх позначити, варто намисто приміряти, тому що на ескізі та на шиї все це виглядає по різному.
Потім на джгути нашила ріволі.
Last time I was at the Autumn Ball in my final school year... The weather was very warm then and on some reason the theme of the night was chintz clothes that had none of autumn associations and ideas, obviously the change of seasons in a warm climate is not so bright, it's rather boring...
I don't remember me visiting any of such events since then but to become an autumn's guest one needs no invitation at all. And it is so easy to enjoy the real ball of the picturesque colours and hues of the season and get from this so capricious but so beautiful lady Autumn as much inspiration as you want to create nice things.
Намисто "Осінній бал"
Останній раз я була на осінньому балу у випускному класі школи.. На дворі було дуже тепло і чомусь темою того вечору обрали ситцевий одяг, який не навіював жодних осінніх думок та асоціацій, адже в теплому кліматі зміна пор року не така яскрава, скоріше навіть нудна...
Не пригадую, щоб з того часу мені доводилося бувати на подібних заходах, але ж в гості до осені можна і без жодного запрошення з'явитися і насолодитися справжнім балом мальовничих відтінків її розкішного вбрання та отримати від цієї примхливої, але такої гарної пані Осені скільки забажаєш натхнення на створення гарних речей.

To create the necklace took me pretty much time and made learn a new technique. The necklace made mostly of the other necklace I unpicked last month before making the Donut Earrings. The short parts of the herringbone spiral were lengthened and joined in one new rope. I learned how to make Russian leaves (it is strange but the term exists only abroad, nobody calls it Russian here) to decorate the necklace and made them of three sizes. The feature of the leaves - all of them are different even if you make them in the same way:-) It also depends if it is beaded with the thread (1) or fishing line (2). For the necklace the latter is better because the shape is firmer.
На створення намиста пішло доволі багато часу та довелося вивчити нову техніку. Намисто зроблено переважно з матеріалів іншого намиста, яке я розібрала минулого місяця перед тим, як зробила ці сережки "Пампушки". Короткі частини джгута було подовжено і з'єднано в одну. І я навчилася плести листя з бісеру, щоб прикрасити намисто і зробила їх в трьох різних розмірах. Особливість такого листя - воно все різне, навіть, якщо щоразу все робиш однаково:-) Також має значення чи плетеш на нитку (1) чи на волосінь (2). Для такого виробу другий варіант кращий, бо форма листа жорсткіша.

The most complex part is to join all the elements together. The most important to invent how to do that. After quite long thinking I decided to use the idea of joining the Irish lace - the ready elements are pinned on the base and join with crocheted chains. So I drew an about scheme of the elements arrangement and started to join them with flat herringbone ropes. I won't give any recommendations because it is free improvisation united with the same seed beads.
Найскладніша частина - з'єднати всі елементи до купи. Найважливіше - вигадати, як це зробити. Я вирішила скористатися ідеєю з'єднання ірландського плетіння, всі готові елементи якого наколюються на основу і потім з'єднуються гачком ланцюжками. Отже намалювала приблизну схему розташування елементів і розпочала з'єднувати їх пласким джгутом ндебеле. Жодних рекомендацій давати не буду, бо це - чиста імпровізація об'єднана однаковим бісером.

The lower rope made in the same way. You must be careful here and leave enough room between the two ropes otherwise, when they are ready, they can be put on each other.
Нижній елемент робиться так само. Тут треба бути дуже обережним і залишити достатньо місця між двома низками. Інакше в готовому вигляді вони можуть накластися одна на одну.
Before joining the leaves to the necklace I sewed them in pairs. In this way it was easier to find the right points of joining them to the orange beads.
Перед тим як приєднати листя до намиста, я їх зшила парами. Таким чином набагато легше було визначити місця їхнього подальшого приєднання до помаранчевих намистин.
It is a very nice necklace and I am really very glad and proud with the result. I also think that not to be invited to the Autumn Ball is not a problem... as the feast of creating revives every time when you feel inspired not depending on the season:-)
Намисто вийшло дуже гарним і я справді радію і пишаюся результатом. Я також думаю, що не отримати запрошення на Осінній Бал - це не проблема... Адже свято творчості оновлюється щоразу коли відчуваєш натхнення і це не залежить від пори року:-)
I like making projects from the beads which I cannot buy at my city... Maybe right because of this reason:-) Almost as in that poem about the weather "man is a fool..... he always wants what he has not":-) But when it goes about my beading, it means that I should plan less or more exactly what I am going to create so that to buy matching materials wherever I find them. As I am a person of chaos and do beading as a hobby, it is not easy and typical for me to predict my possible project in advance. That's why the materials happen to wait for indefinite time to be used. For example, these twins were bought several months ago but the idea of the necklace ripened only now under the influence of my summer trip to the sea.

Джгут із твінів, або вечір на узбережжі
Мені подобається робити речі з матеріалів, які неможливо купити в моєму місті... Мабуть якраз з цієї причини:-) Людина ж завжди хоче те, чого не може отримати:-) Але коли йдеться про нанизування, це означає, що мені доводиться заздалегідь планувати, які вироби хотілося б зробити, щоб купити необхідні матеріали, де б я їх не побачила. Оскільки я людина хаосу, а нанизування для мене - захоплення, то для мене це і не легко і не типово. Тому і трапляється так, що матеріали чекають невизначений час на своє призначення. Наприклад, ці твіни я купила декілька місяців тому, а ідея намиста дозріла лише зараз під впливом моєї літньої подорожі до моря.

The idea was to use the twins to make a spiral necklace. Such kind of the spiral I already made for this project and as I had twins of the same colour style but different hues it was a good choice. I also wanted the necklace to fit close to the neck. Besides, you can see the zigzag pattern formed by the beads. You get it if you bead one spiral "from you" and the other "to you" (as if to the right / to the left).
Головною ідеєю було зробити з твінів спіральний джгут. Такий вид джгута я вже робила для цього проекту і оскільки твіни у мене однієї кольорової гами, але різних відтінків, це було якраз те, що треба. Мені також хотілося, щоб намисто прилягало до шиї. Крім того, можна побачити візерунок у формі зигзагу, утворений намистинами. Так виходить якщо плести один джгут "від себе", а інший "до себе" (наче ліворуч/праворуч).

To join a clasp is the hardest moment here. Mostly because I wanted the necklace to look as one piece although made of three. So I made both the spirals and the loops on the ends of different length.
Приєднати застібку було тут найскладнішим. Переважно тому, що мені хотілося, щоб джгут виглядав як єдине ціле хоча і зроблений з трьох частин. Тому зробила і самі частини і петлі застібки різної довжини.
To make the necklace took me about 43 - 45 grams of twins of each colour. Nice result and great temptation to have more stashed materials to realise any idea without thinking if you have enough beads for it.... Very dangerous temptaion, by the way...:-))
На намисто пішло десь по 43-45 грамів намистин кожного кольору. Результат гарний і велика спокуса мати більше матеріалів в запасі, щоб можна було здійснити будь яку ідею не вагаючись чи вистачить на неї матеріалів... Дуже небезпечна спокуса, до речі...:-))
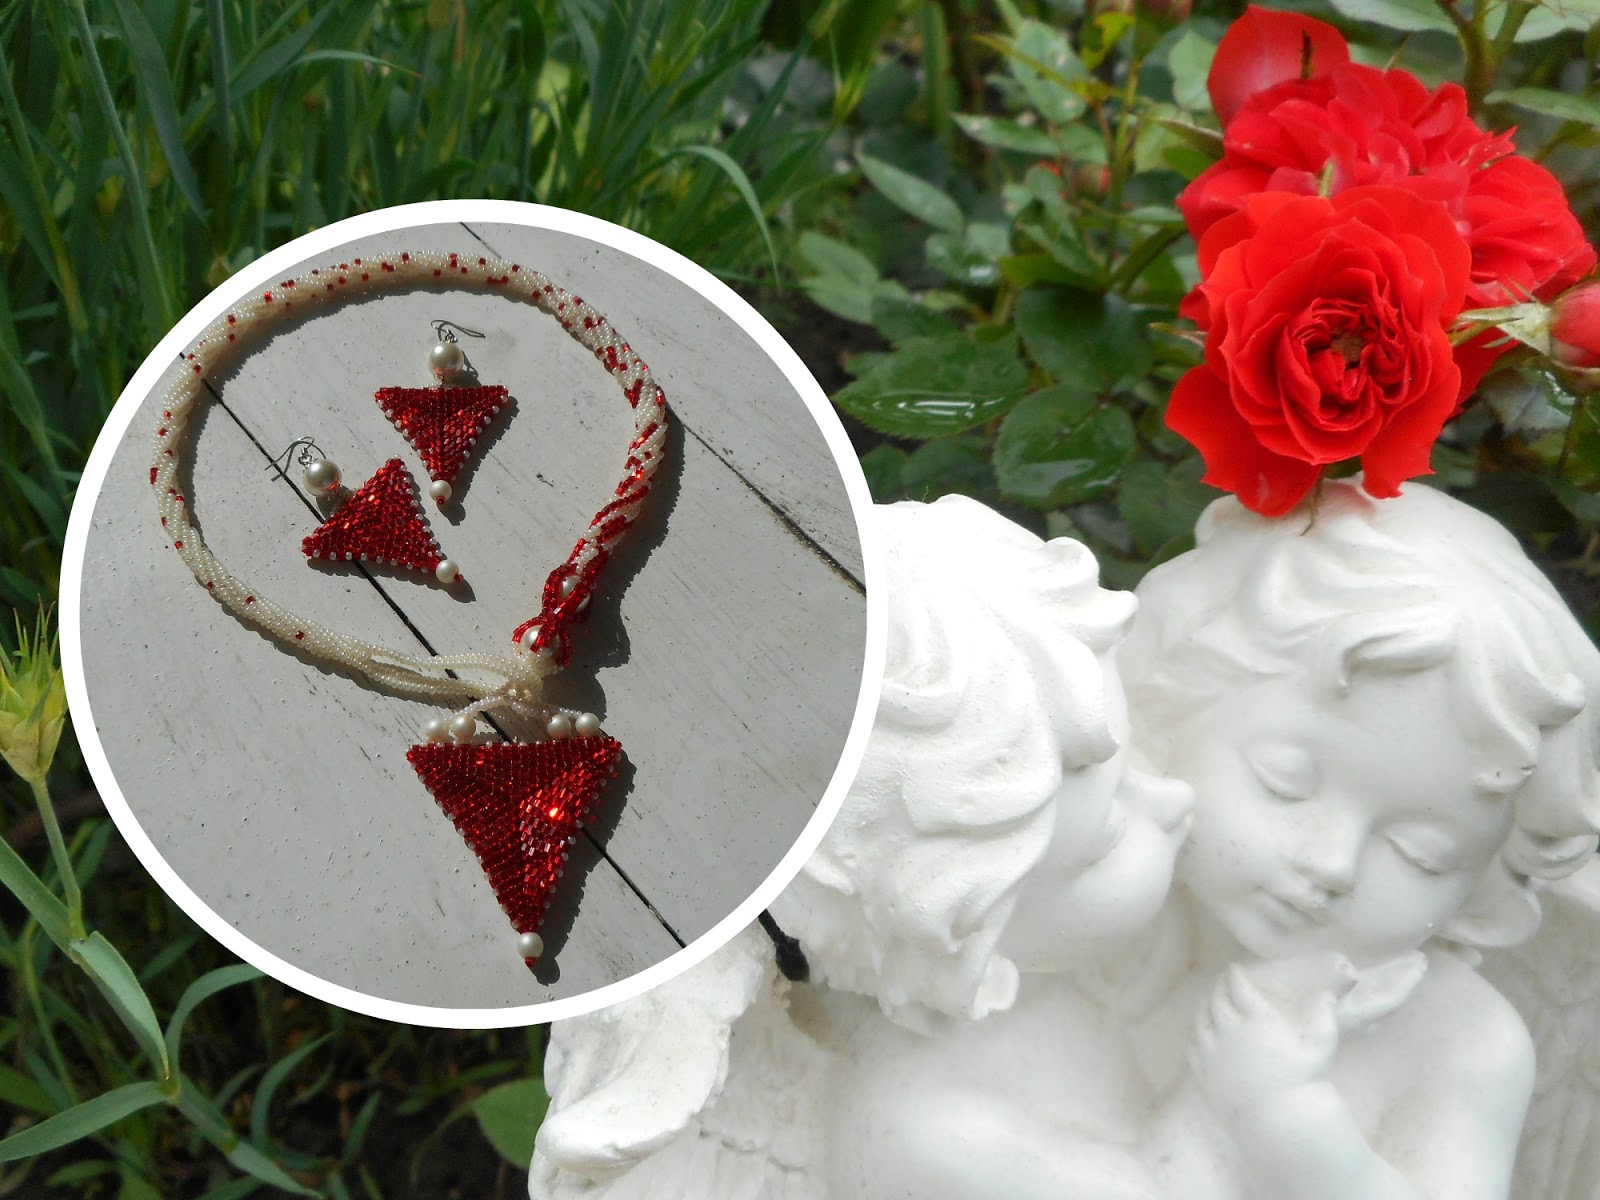
What a charming thing our mood is: a couple of weeks ago, these earrings made me think about the arrow's tip but now, when the pendant is ready, I only see a pointer on the road in this peyote triangle:-))
Probably on the simple reason that rainy days make us more romantic and sentimental but now I am mostly focused involuntarily on the dreams about some summer trips. So let this triangle point only the right direction to the places where we can find some fun, stay safe and some of our dreams come true:-)
Мозаїчний трикутник, або Кулон "Дороговказ"
Яке ж все ж таки чарівне явище наш настрій: пару тижнів тому ці сережки наводили лише на думку про наконечник стріли, а зараз, коли кулон готовий, я лише бачу в цьому мозаїчному трикутнику дороговказ :-))
Мабуть, причина тут дуже проста: дощові дні схиляють нас до більш сентиментальних і романтичних думок, а зараз я мимоволі більш зосереджена на мріях про якісь літні подорожі. Отже, нехай цей трикутник вказує лише правильний напрямок руху до місць, де ми почуватимемося в безпеці, дозволимо собі трохи розважитися і, можливо, навіть збудуться якісь наші мрії.

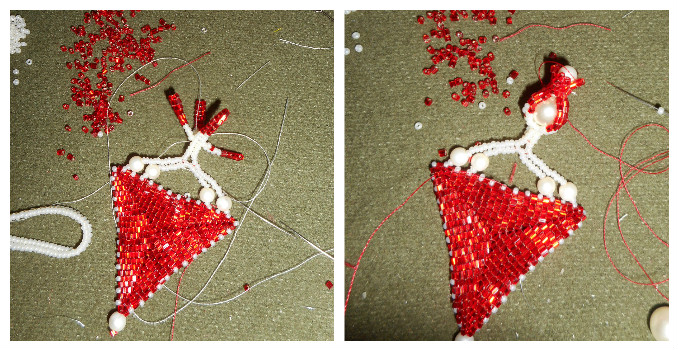
The triangle for the pendant is made by the same technique and tutorial as for the earrings but with a few rows bigger. After finishing the element, I gathered the materials left from the earrings and made up a few variants of their combinations. The final one is on the photo.
The rope was made of two parts. At first, I made a short spiral tubular herringbone with a loop, long enough to use it as a part of the clasp. How to make such a loop is here, start from min 32:36.
Трикутник для кулона зроблений в тій самій техніці і за тим самим МК, що і сережки, але на декілька рядів більший. Коли елемент був готовий, я зібрала всі матеріали, що залишилися від сережок, і скомбінувала декілька варіантів. Остаточний - на фото.
Джгут для кулона робився з двох частин: короткий відрізок спіралі "ндебелє" і закінчила його петлею достатньо великою, щоб вона стала частиною застібки. Як зробити таку петлю, знайшла тут. Початок від 32:36 хв.

Then in the one but last row of the white seed beads I added two more white seed beads, locked them in the ring and made few rows of tubular herringbone, then added tow more between every pair of the seed beads and got eight seed beads. They were divided and then beaded separately to hold the big, 10-12 mm pearl. After that I experimented a couple of evenings again and at last just added one more pearl.
Потім в передостанньому ряду з білих бісерин я додала ще дві білих бісерини, замкнула їх в кільце і нанизала декілька рядів прямого джгута "ндебелє", потім додала ще по дві білих бісерини між кожної парою і отримала вісім. Потім поділила всі на пари і нанизувала чотири кінці окремо, щоб утримати велику, 10-12 перлину. Після цього я знову експериментувала пару вечорів і врешті решт просто додала ще одну перлину.

Then went to the spiral herringbone and while beading alternated the colours and the types of the seed beads in free oder, decreased to six seed beads. When got the desired length of the rope, sewed the loop part to it.
Потім перейшла до спірального джгута "ндебелє" і, поки плела, чергувала види і кольори бісеру у вільному порядку, убавила дві бісерини, щоб джгут став на шість. Коли сплела його бажаної довжини, зшила з першою частиною.
Undoubtedly the time of spring garden blossoming, that hasn't come here yet, by the way, is one of the most inspiring and symbolic in a year. Which of us is not waiting for it and who is able not to rejoice at the beauty of the real new life's feast? And it is almost impossible to keep oneself from the wish to get at least a tiny piece of this spring tenderness that is given to us by nature with the magnificence of gardens' blossoming. So, let's try to express this dreamlike impression in new jewelry :-)
Джгут Пейот "Спокуса весняного цвітіння"
Без сумніву пора весняного цвітіння садів, яка ще тут не настала, до речі, є однією з самих натхненних і найбільш символічних в році. Хто ж її не чекає і не радіє красі справжнього свята нового життя. І дуже важко утриматися від бажання закарбувати хоча б маленьку часточку цієї весняної ніжності, яку дарує нам природа разом з пишним цвітінням садів... Отже, спробуємо виразити те казкове враження в новій прикрасі :-)

There is not much to tell about my work on the necklace because it is just a modification of a Cellini spiral (or peyote tubular), two of which I've already made before for Carpathian Path pendant and for Catch the Wave bracelet. While choosing the colourstyle, I thought about Spring Blossoming, but when pondering about the materials, I thought about one of my favourite YouTube teachers ( +Jill Wiseman ) words who often finishes her basic tutorials with encouragement to try new techniques with different kinds of beads. And thus this time I chose three of them: 8.0, 10.0 and triangles. Before I started beading this spiral in this alternation of colours and beads, 7!!! samples were made. But having the result in front of my eyes I have none of regrets about the time spent for experiments. It was worthy and useful.
Про мою роботу над цим намистом особливо немає чого розповідати, тому що це просто одна з модифікацій джгута Селіні (Челіні), або джгута пейот, який я вже робила для кулону "Карпатський шлях" та браслету "Тримай Хвилю". Поки обирала кольорову гаму, думала про цвітіння садів, а ось коли замислилась над матеріалами, тримала на думці слова однієї з моїх улюблених YouTube вчителів +Jill Wiseman, яка часто закінчує свої базові майстер класи заохоченням пробувати нові техніки різними намистинами. Тому цього разу я зупинилася на бісері №№ 8 і 10 та трьох граній рубці (трикутниках, не впевнена, що обрала українською правильний термін, але "нехай буде гречка", як казала моя бабуся, коли щось не мало такого вже принципового значення). До того як почала плести джгут такої конфігурації, було зроблено 7!!! зразків. Але маючи перед очима результат, не маю жодного жалю що до витраченого на експерименти часу. Це було варто і корисно робити.
So let's get back to our sheep, I mean to the beading twin bezels, and this time it goes about a big one, 27 mm rivoli. I have doubts as for its unique nature, but as I haven't found any free tutorial to do that, I am pretty proud of myself and my work and am absolutely ready to share what I learnt and what mistakes made.
I must confess I experimented for a few evenings. I got a very good result, but one of my big rivolis lost its amalgam covering, and in this way, instead of a shining element, I have a piece of glass that is only good to go on experimenting. What I learnt from this lesson: the rivloli's back should be beaded in full.
Як обплести ріволі на 27 мм, або Ще більше гіпнотичного сяйва
Ну що ж, як казав Карлсон, продовжимо розмову :-) Мова піде про оплетіння твінами ріволі на 27 мм. Можливо я і не перша в цій справі, але жодного безкоштовного МК, як це зробити, я не знайшла, тому пишатимусь собою і своїм витвором, а разом і поділюсь набутими під час роботи досвідом та зробленими помилками.
Маю зізнатись, що експериментувала декілька вечорів: гарний результат я отримала, але зрештою на одному з моїх великих ріволі частково витерлося амальгамне покриття і з чарівного елементу він перетворився на шматок скла за 17 гривень, то тепер на ньому можна проводити експерименти безкінечно. Висновок з цього уроку: задню стінку ріволі бажано оплітати повністю.

All the materials were mentioned already in the previous post so just go on. Start the work with 11 twins locked in the ring, then bead the second row. The third row is increasing: bead two twins after every one from the second row but to avoid twisting and to get better fitting of the bezel, add only one twin after the last one of the previous row. In this way, we have the circle base of 21 twins.
Then go on beading with these numbers of twins. Try the bezel on your rivoli, add one or two more rows and finish with alternation of twins and seed beads. That's all.
Всі необхідні матеріали вказані в попередньому дописі, то просто продовжую. Починаємо роботу з 11 твінів замкнених у кільце, нанизуємо другий ряд. В третьому ряду подвоюємо твіни: додаємо по два після кожного твіну з другого ряду, але, щоб уникнути перекручування та отримати краще прилягання цапа, останню прибавку не робимо, тобто додаємо лише один твін. Таким чином маємо основу з 21 твіну.
Продовжуємо нанизування цією кількістю твінів. Приміряємо ріволі в цап, додаємо ще два-три ряди і закінчуємо рядом з чергуванням твіна та бісерини. Це все.
 The final embellishment with the drops is the same as for the small rivolis. The only difference, I added two rows of drops instead of one.
Кінцеве оздоблення дропсами виконуємо так само як і для маленьких ріволі. Єдина відмінність, замість одного ряду дропсів я додала два.
The next step is to decide how to arrange all the elements, and that is the question of your fantasy and wish. All the elements are connected in the same way. It is the same as in this tutorial but instead of two rows of twin-connectors, I made three because the big rivoli is quite heavy so I thought it would be more reliable.
What I learnt; add the twins for the connection while reinforcing the bezel because otherwise it will be difficult to pass through the beads few times more then.
На наступному етапі вирішуємо, як розташувати всі елементи, це вже питання твоєї фантазії та бажання. Всі елементи з'єднані однаково. Так само як в цьому МК, але замість двох рядів твінів-коннекторів, я зробила три. Великий ріволі доволі важкий, тому я подумала, що так буде надійніше.
Чому я навчилась; додавай твіни-конектори під час зміцнення цапа, тому що в іншому випадку протягнути нитку (леску) ще декілька разів через намистини буде важко.
After assembling. The final element looked in this way. And now it is the right time to think about the rest of the necklace.
Остаточний елемент виглядав ось так після зборки. І якраз саме час подумати про решту намиста.
As I had a lot of twins of both colours and spirals are my great weakness, I decided to learn new technique to use as more twins as possible. I also wanted to make a toggle of twins.
I found only two kinds of spirals made of twins and this one matches much better the idea of my necklace so I learnt it. In the same tutorial you can find the way how to bead toggle but I used only instructions for the ring. The bar was made with peyote (there are a lot of tutorials, you can choose whatever you like). In fact, it is the same beaded bead like I did for this necklace, I just made it bigger and decorated with twins.
Оскільки я мала набагато більше ніж треба твінів і маю певну сдабкість до джгутів, то я засвоїла нову техніку, щоб використати їх якнайбільше. Крім того, вирішила сплести і тогл.
Знайшла лише два вида джгутів з твінів і цей сподобався мені більше, до того ж він якраз відповідає ідеї намиста. В цьому ж МК є зразок виконання тоглу, але я лише скористалася інструкцією виготовлення кільця застібки. Поперечину я нанизала пейотом (є багато МК, можна вибрати щось до вподоби). Фактично це така сама намистина, як я робила для цього намиста., тільки більша і я прикрасила її твінами.
Splendid work, isn't it? :-)
Чудова робота, згодні?:-)
I started writing this short introduction to my new project few times and couldn't decide what is worth mentioning the most in it: either the beauty of Ukraine or her diversity or that definite trip about Western Ukraine I made with my father or my wish to come back to see those places again. But all that together is very dear for me and deserves to be united in one single piece. And it is exactly what I tried to reflect in my new necklace.
Намисто "Карпатським шляхом"
Декілька разів починала писати цей коротенький вступ до мого нового проекту і не могла вирішити, про що ж маю згадати більш за все: чи про красу України, чи про її різноманітність, чи про ту мою подорож з батьком по Західній Україні, чи про моє бажання побачити ті місця знову. Але все це разом багато важить для мене і заслуговує бути об'єднаним в єдине ціле. Що я і спробувала відобразити в моєму новому намисті.

The trip happened long ago, eight or nine years ago, don't remember exactly. At those times I was as far from having a digital camera as the one I used was from being called a camera as well:-) I only have just a few pictures of bad quality from that journey and got used to think I have none at all. Fortunately, the value of the events is not estimated by the quality and number of the pictures but by the impressions and memories only. That's why I had no doubt as for the using one of those pictures for learning new technique - beading embroidery, namely beading a Cabochon. I cut the oval from one of those photos to glue to the transparent cabochon for the further making the pendant.
Ця подорож відбулася давненько, вісім чи дев'ять років тому, точно не пам'ятаю. В ті часи я була настільки ж далека від купівлі цифрової камери, наскільки те, чим я знімала, далеке від поняття камери :-) У мене є лише декілька фото з тієї подорожі і я вже давно звикла думати, що у мене їх взагалі немає. На щастя, цінність подій визначається не якістю та кількістю фото, а лише враженнями і спогадами, тому без жодних докорів сумління я використала одне з них, щоб оволодіти новою технікою - вишивкою бісером, а саме, оплетінням кабошону. З однієї з тих світлин я вирізала овал, щоб наклеїти до прозорого кабошону для подальшого виготовлення кулону.

There are many different tutorials how to make it so it is easy to find the one you like: all of them are pretty identical. For example, I liked +Beadaholique tutorials because all of them are gathered on one page on their site and you just use the video you need during the process of work.
The sense of such beading is to make the cabochon to stay in bezel and to give the bezel the right form you need two different kinds of seed beads. Mostly they mention 11.0 and 15.0. I had none so I used cylindrical seed beads (brown cuts) and 10.0 which is the most spread here.
Майстер класів по оплетінню кабошонів більше ніж досить і можна вибрати, який тобі подобається: всі вони майже однакові. Мені, наприклад, сподобалися МК +Beadaholique, тому що зібрані на одній сторінці їхнього сайту і можна легко знайти відео, яке тобі потрібно в процесі роботи.
Сенс такого оплетіння полягає в тому, щоб примусити кабошон триматися в оправці, а щоб надати їй правильну форму, використовують бісер різного розміру. Найбільше згадують №№11 і 15. У мене не має ані того, ані того, тому я використала циліндричний бісер, або рубку (коричневу), і найбільш доступний у нас №10.
 So after gluing the cabochon, we bead it around with peyote stitch. At first I made three rows of brown seed beads, then two green and, as I felt some lack of sky in my picture, one row of blue.
Отже після наклеювання кабошону, ми його оплітаємо по колу стібком пейот. Спочатку я плела три ряди коричневим бісером, потім два зелено-райдужним і, оскільки мені не вистачало неба на моєму фото, додала один ряд блакитним.
And then I understood I want it more:-) So decided to make extra trim on my own idea. To make the same you need the number of the seed beads in the just trimmed row to be divided for 4.
Потім я зрозуміла, що хочу ще:-) Тому вирішила прикрасити готовий елемент. Щоб зробити те саме, тобі потрібно, щоб кількість бісерин в щойно оплетеному краї ділилася на 4.
But that was not enough, either so I invented one more row to embellish the element. Here it is the step one.
Але цього також виявилося не досить, тому я вигадала ще один ряд, щоб прикрасити мій кулон.
Тут перший етап.
And here are the pictures of the second step. And then reinforcing: pull the thread through all the seed beads of the first and the second rows of this lace edge.
Тут фото другого етапу. Потім зміцнення всього плетіння протягуванням нитки через всі бісерини першого і другого ряду цього ажурного краю.
The second element of my necklace is a mini-Cellini spiral beaded by this tutorial. In summer I already made one but different beads created absolutely different look so this kind of rope can be varied again and again.
Другий елемент мого намиста - такий собі міні Селіні джгут нанизаний за цим МК. Влітку я вже такий робила, але різний бісер дає абсолютно інший ефект, тому цей вид джгута можна урізноманітнювати знову і знову.
As a clasp I chose a toggle and joined the pendant to the spiral with seed beads stringing.
The necklace is beautiful indeed and I can be proud of the way I managed to embody my idea.
Для застібки обрала тогл, а кулон приєднала до джгута бісерними низками.Намисто вийшло дуже гарним і я можу пишатися тим, як мені вдалося втілити мою ідею в прикрасі.

 Right after my Christmas tree is disassembled, I think I had more than enough it not to miss its ornaments for quite a long time. But in a couple of months I am already ready to dream about next winter holidays time, don't mind watching a thematical film, and also get inspiration from that. I am glad when this mood implements into something materialistic not only teasing the imagination. For instance, this time I, at last, made a bugle beads rope surely inspired by Christmas tree lights thanking to the used material.