About Me

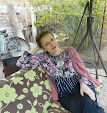
My photo
My blog's main subjects are sewing, the thing in which I am experienced the most, and beadwork, which is, in fact, pushed me into blogging. I am also engaged in knitting and crocheting. All together they are the set of skills which I use to make my wardrobe my whole life. These are not my only interests, I also like the English language (that's one of the reasons that my blog is bilingual), try to travel around my country and abroad (when can afford it), am interested in art (to the degree of a dilettante but nevertheless) and adore the people who can create anything beautiful or useful whatever it is :-) So welcome to a needlecrafter diary!

25 February 2017

Red Necklace, or A Bit of Moulin Rouge :-)


Kids are often asked what they want to be when grow up. And as many times you ask them as many different answers get. Of course, there are some outstanding persons who right after being born want to become... aircraft designers but those are exceptions.  I was enquired  the same and not once but I remember only one of my replies. Once upon a time I declared I wanted to be a can-can dancer in a variety show. Probably it was under influence of operetta films which I adored or maybe it was the result of watching Deutsches Fernsehballett that we were shown only once a year at the end of New Year's night. But that was the fact :-) My wise mum, who still has very high standards of woman's behaviour, wasn't angry with me and even wasn't surprised. She said it was a good idea but then added that I wouldn't be taken there because I was not tall enough. And the height is the thing nobody can change... But who can object against getting inspiration from that burlesque dancing and what place, but Moulin Rouge, is the most prominent embodiment of a variety show...


Червоне намисто, або Дрібка Мулен Ружу:-)


Дітей дуже часто питають ким би вони хотіли стати, коли виростуть. І скільки запитують, стільки різних відповідей і чують. Звісно, бувають такі цілеспрямовані особистості, які ще при народженні вирішують стати...  конструкторами літаків, але це виключення. Мені таке питання теж ставили не один раз, але я пам'ятаю лише одну свою відповідь. Якось я заявила мамі, що, коли виросту, хочу танцювати канкан у вар'єте. Може це було під дією перегляду фільмів-оперет, які я обожнювала, а може дало плоди "тлєтворноє вліяніє Запада" у вигляді балету телебачення Східної Німеччини, яке нам показували раз на рік під ранок новорічної ночі. Але факт такий був :-) Мудра мама, яка і досі вирізняється суворими вимогами до жіночої поведінки,  не розлютилася і навіть не здивувалася, вона просто сказала, що ідея гарна, але мене не візьмуть до балету через маленький зріст. А зріст - це таке, що змінити не можна... Але ж хто може завадити черпати натхнення з образів того запального танцю і яке місце як не Moulin Rouge є найвидатнішим втіленням вар'єте...


Besides all its bright images, the variety show is a real incarnation of the things that in reality are not what they seem to be. Exactly like my necklace, the tutorial of which I found on Preciousa site. It doesn't look complex until the assembling of the elements starts. Maybe the work was more complicated because I didn't find the exact materials so substituted 3 and 4 mm fire polished for 7.0 seed beads and 4 mm pearls and had to adjust the pattern a little.
And I didn't understand how to make the CRAW rings by the schemes on the site so just made the CRAW stripes and joined them in rings with the same result.


Вар'єте є не лише є джерелом яскравих образів, це  ще і справжнє уособлення явищ і речей, які насправді є не тим, чим здаються. Точно як моє намисто, МК якого я знайшла на сайті Preciosa і яке виглядає не таким вже і складним, поки не починаєш з'єднувати всі елементи. Можливо робота трохи ускладнилася через те, що я не знайшла таких самих матеріалів як на сайті, тож я замінила 3 мм і 4 мм fire polished на бісер 7.0 і 4 мм перлини і мала трохи пристосовуватися до них.
Також я не зрозуміла, як вони плели кільця в "хрестик", тому просто зробила смужки в "хрестик" і потім їх з'єднала в кільця.


Besides, I had a lack of 4 mm pearls so made two pearl round elements and two 7.0 seed beads by the same pattern.
The matching earrings are here.
As you see the "Quatrefoils" surely remind the wings of the mill (moulin) so I had no chance to avoid the memories about my naive childish wish:-)


Крім того, мені не вистачило 4 мм перлин, тож зробила два круглих кільця з перлин, а два - з бісеру 7.0 за тим же зразком.
Сережки до пари тут.
Як бачиш ті "Quatrefoils" (чотирилисники) і справді нагадують крила вітряка, тож у мене не було шансів не згадати моє наївне дитяче бажання:-)


18 February 2017

Frozen Lavender Dress

All what I could say about me and lavender was already said here so now I only want to tell a story about how it happened with this new project... I mean creating and assembling outfit and the jewellery in one single image. The process itself reminds stringing different elements on the thread but instead of the beads the ideas, inspiration, purchasing, sewing and beading play the roles.
Probably a year or more ago I saw the nice fabric in the store but it surely was  not affordable for me and I refused from the speedy shopping. I only dropped in that store several times during the year and checked if the fabric was still there. Then my trip to Croatia and lavender episode cultivated the idea of the jewelry set and I thought it would match the dress made from that beautiful fabric, which I still didn't have. Then  I bought all kinds of lilac navettes I had found and sketched the approximate sample of the future necklace that would have to match the dress from the fabric, which I still didn't have. Then all the materials for the beading were prepared and I started to bead the navettes for the necklace that had to match the fabric, which I still didn't have. And then I yet decided it was the right time to buy the fabric because I had no idea why I needed that necklace without the dress from the fabric I still didn't have. And when at last I came to the store, it turned out they only had the last piece of the fabric that was enough for sewing the dress. It is not a story it is a saga:-) 


About the jewellery is here.


Трикотажна сукня "Замерзла лаванда"


Все що можна було сказати про мене і про лаванду, було вже сказано тут, тому зараз я просто розповім історію як це відбулося з цим новим проектом... Маю на увазі створення і компонування вбрання і прикрас в єдиний образ. Весь процес і сам нагадує нанизування різних елементів на нитку, але в ролі намистин виступають ідеї, натхнення, придбання, пошиття і нанизування.
Можливо десь рік чи трохи більше тому я побачила в крамниці гарну тканину, але вона була для мене надто дорогою, тому від квапливої покупки довелося втриматися. Я лише зазирала в ту крамницю декілька разів перевірити чи тканина все ще там. Потім моя подорож до Хорватії і епізод з лавандою виплекали ідею набору прикрас, про який я подумала, що він підійшов би до сукні, тканини для якої у мене все ще не було. Потім я купила всі види наветт, які тільки знайшла і намалювала ескіз намиста, яке підійшло б до сукні з тканини, якої у мене все ще не було. Потім було підібрано всі матеріали і я почала обплетати наветти для намиста, яке підійшло б до сукні з тканини, якої у мене все ще не було. І потім я подумала, що все ж таки час купити ту тканину вже настав, бо навіщо мені намисто без сукні з тієї тканини, якої у мене все ще не було. А коли я нарешті припленталася до крамниці, виявилося, що у них залишилося тієї тканини якраз стільки, щоб мені вистачило пошити сукню, намисто до якої я вже почала плести. Це не історія, це - сага :-)


Про прикраси тут.


To the previous story I had to add that the fabric was meant to be right for sewing model #116 from Burda 1/2017 with some modifications. The fabric is woolen jersey and for the lining I chose rayon with interesting texture.


До всієї попередньої історії я мала додати, що тканина купувалася спеціально для пошиття моделі 116 з Burda 1/2017 з деякими змінами. Матеріал сукні - вовняне джерсі, для підкладки я обрала віскозу з цікавою структурою.


I changed the front neck hole cut. I thought a deep V-neck is not suitable for a woolen dress. Besides, I didn't like the way it looked in the magazine, it seemed had no good fitting.
So I lengthened the front centre line and then drew a new line of the neck hole cut. By the new front pattern the draft of the facing was changed as well.
 After the cutting the fabric I've got a new front detail without a seam and it was good to embellish or decor it in any way either with a piece of jewelry or embroidery or whatever.


Я змінила лінію вирізу передньої частини. Я подумала, що глибокий мис не підходить до вовняної сукні. До того ж мені не сподобалося як він виглядав у журналі, здалося, він не дуже добре прилягає.
Отже я подовжила центральну лінію переду і намалювала нову лінію вирізу. Відповідно до нової викрійки переду було змінено і викрійку обшивки.
Після розкрою я отримала нову деталь переду без шва і вона була чудова для подальшого декорування чи то прикрасою чи вишивкою абощо.


Next step to note is making the skirt. I made it in full leaving the open part of the seam for the zipper. It gave me the chance to try the skirt on before the dress was ready and correct the defects.


Наступне, про що варто сказати, пошиття спідниці. Я її зробила повністю залишивши відкриту частину шва для вшивання блискавки. Це дало мені можливість приміряти спідницю до того, як сукня була готова і виправити недоліки.


Defects can be different because our curves are individual. In my case there was some bulging along the front joining seam. So I pinned the extra fabric, then marked new line on the wrong side of the skirt along the pins. Then unpicked the baste of the seam, drew the new line by the marks. In this step I would recommend to draw a nice line better than exact. And then stitched all the seam from the waist to the hem.


Недоліки можуть бути різними, тому що наші вигини індивідуальні. В моєму випадку по переду вздовж  з'єднувального шва був наплив тканини. Тому я сколола його булавками, потім зі зворотнього боку намітила по тим булавкам нову лінію шва. Потім розпустила наметку, накреслила нову лінію. На цьому етапі я б рекомендувала креслити красиву лінію, а не абсолютно точну. І вже потім прострочила весь шов від талії до низу.


As I changed the front part of the bodice, I cut the neck holes of the lining after the lining was almost ready.
Don't forget to make the cuts along the seams to get better fitting of the facing.


Оскільки я змінила передню частину переду, виріз на підкладці я кроїла, коли вона була вже майже готова.
Не забуваймо для кращого прилягання обшивки зробити надрізи вздовж її швів.


I also made a mistake when sewing the facing to the dress. And noticed it only when it was late to correct it. So hope it prevent other dress makers from making it. As you see on the photo the corner had to be made as a continuation of the sleeve seam and I did it wrong.


Я також припустилася і помилки, коли пришивала обшивку до сукні. І помітила це, коли виправляти її вже було запізно. Сподіваюсь це вбереже інших кравчинь від неї. На фото видно, що куток мав бути на продовженні шва рукава, а я зробила його неправильно.


And few words as for the final steps. The most important - ironing.

My fabric is very beautiful but pretty stretching so while working on the outfit some parts changed there shapes. For example, front side details had some bulging. They had to be steamed to deprive that.
All the hems, both sleeves' and dress's were processed with slip stitch. Thus there was made a lot of hand work here.


І декілька слів про завершальні кроки. Найголовніший - прасування.
Тканина у мене дуже красива, але доволі добре розтягується, тому поки я працювала над вбранням, деякі його деталі змінили форму. Наприклад, бокові частини переду набули здуття. Тому вони мали бути оброблені паром і спрасовані.
Всі підгинки, і рукавів і сукні, були підшиті потайним стібком. Тож, тут було багато ручної роботи. 
15 February 2017

Frozen Lavender Necklace

As always after finishing complex long term project of my own design my mood swings from "WOW, I have made it!" to "I'll never make it any more, only following the ready patterns next time" :-) There's no need to say that the first idea prevails with passing time and the doubts, remaking and disappointments of the latter are fading out during few days and that's why I'll know when I am ready to start something new. I'd say the common pattern of our life can be described in the same way if the post wasn't related to my beading, doesn't it? :-) 


Намисто "Замерзла Лаванда" 


Як завжди по закінченні складного довготривалого проекту за власним дизайном мій настрій коливається від "Не можу повірити, що я це зробила!" до "Ніколи в житті такого не робитиму, лише наслідування готових зразків!" :-) Марно казати, що з часом перша думка бере гору, а сумніви, переробки і розчарування другої розсіюються протягом декількох днів і так я дізнаюся, що готова починати щось нове. Я б сказала, що так можна описати загальну модель нашого життя, якби цей допис не стосувався мого бісероплетіння, чи не так? :-)


I wish I could repeat here the same words from the Frozen Lavender earrings post. I mean "If all the details are ready, the only thing to do is to assemble them together" and generally it would be almost true because the final result of any project is the elements composed together but in this case this process took ten days and it  was much longer than making the navette components. 
At first I drew a sketch of the ready necklace. Then beaded two kinds of ropes: tubular peyote from 10.0 seed beads of three colours and tubular herringbone from cut beads of three colours.


Хотілося б мені повторити тут слова з допису про сережки "Замерзла лаванда", а саме: "Якщо всі деталі готові, єдине, що лишається зробити - зібрати їх до купи". І загалом це було б цілком правильно, бо будь який готовий виріб - це упорядковані і з'єднані разом елементи, але в цьому випадку процес зайняв десять днів і це було набагато довше ніж обплетення наветт. 

Спочатку намалювала ескіз готового намиста. Потім сплела два види джгутів: пейоточний з бісеру 10.0 трьох кольорів і ндебеле з рубки трьох кольорів.


And only now almost all the components are ready to be assembled. And it takes the most of time. To sew the bigger navettes to the ropes at first I beaded a short (about two cm) pieces of flat herringbone ropes to the ends of the peyote ropes and then sewed the rivolis to them. Then joined the ropes and sewed the smaller navettes.


І ось лише зараз майже всі елементи готові і їх можна з'єднувати.  І на це якраз і витрачається більшість часу. Щоб пришити великі наветти до джгутів, я нанизала коротенькі (десь по два см) відрізки плаского джгута ндебеле до кінців пейточних джгутів і вже до них пришила ріволі. Потім з'єднала самі джгути. І потім пришила менші наветти.


After both peyote and herringbone ropes were joined, it turned out I had to make cones on my own because nothing matched well to cover the ends of the ropes. I beaded two cones by this pattern which I already used for these earrings but with more widening and without petals.
And then it turned out that the bar of the toggle clasp unfastened so I beaded a peyote piece to wrap the bar in it and thus made it a bit bigger. It is seen on the last photo.


Після того як обидва джгути, і пейточний і ндебеле, були з'єднані, з'ясувалося, що мені доведеться самій робити конуси тому що нічого не підходило, щоб приховати кінці джгутів. Тож сплела дві "чашечки" за цією схемою, яку вже колись використовувала для цих сережок, але з більшим розширенням і без пелюсток.
А вже потім виявилося, що тогл розстібається і тому довелося сплести пейотом невеличкий клаптик, щоб загорнути в нього перетику і вона стала більша (це видно на останньому фото).


Although  it is said modesty embellishes the person it is not my featured trait because I am quite proud of myself and like my work very much:-)


Хоча і кажуть, що скромність прикрашає людину, але це не моя видатна чеснота, тому що я собою пишаюсь і мені дуже подобається моя робота:-)


5 February 2017

Frozen Lavender Earrings


I am glad that from making all those navettes to using them as elements for creating new pieces of jewellery passed not so much time and I still immersed in the embodiment of the image of frozen lavender:-)
The first result is these earrings made with 5 small navettes and one 12 mm rivoli. Despite the earrings are not small, I managed not to make them cumbersome and they save the idea of a refined and gentle flower.


Сережки "Замерзла лаванда" 

Я рада, що від обплетення всіх тих навет до їх використання  як елементів для створення нових прикрас минуло не настільки багато часу, щоб відмовитися від ідеї втілення образу змерзлої лаванди:-)
Перший результат - ці сережки, виконані з 5 маленьких навет і 12 мм ріволі. Хоча сережки і не малі за розміром, вони не виглядають громіздкими і передають ідею ніжної і вишуканої квітки.


If all the elements are ready, the only thing to do is to assemble them together. At first I sewed the navettes by two then sewed the middle one and then sewed of them together.
Bezeling the 12 mm rivoli starts with twenty-eight 11.0 seed beads (Toho).


Якщо всі деталі готові, єдине, що лишається зробити, зібрати їх до купи. Спочатку я зшила навети по дві, потім пришила середню, а потім вже зшила всі разом.
Обплетення 12 мм ріволі починаємо з двадцяти восьми бісерин 11.0 (Toho).


To join the navettes, round rivoli and a hook, I made loops of four seed beads. And then joined the details with a jump ring. The hook was joined while making the loop (two seed beads, a hook, two seed beads).


Щоб з'єднати навети, круглий ріволі і швензу, я зробила петлі з чотирьох бісерин. Потім повісила деталі на кільце. Швенза додається одночасно з набором петлі (дві бісерини, швенза, дві бісерини).

29 January 2017

Bezeled Navette, or Frozen Lavender

Everybody knows that aromas are perceived very individually. For example, I wouldn't take a risk to present somebody perfume not knowing beforehand if the person really likes its scent. And it is not a mystery or great news that our aroma preferences can differ during the life... maybe right because we change ourselves and our perception of many things change as well.
I had never been a fan of lavender scent until last year spent a couple of weeks at Croatia coast. There everything seemed to be soaked with that fragrance spread with the sea breeze. It was absolutely appropriate there and matched the surrounding landscape perfectly... As soon as I came back home, the charms dispelled but the impression is still strong and alive. But, as we have winter now, my lavender became frozen :-)
To embody the idea of the frozen lavender in a piece of jewellry, I learned how to bezel a navette rivoli. I made up a short playlist with the tutorials  that can be helpful while practising. The problem is that not depending on the numberr of the tutorials they only give the common idea of the work if the materials are different (although it can be their advantage not fail:-)). I had navettes 7.5 x 15 mm and 17 x 32 mm and had ambitions to use cut beads.
(The ready elements were used later for making the earrings and the necklace.)


Обплетена наветта, або Замерзла лаванда


Всі знають, що аромати сприймаються дуже індивідуально. Я б, наприклад не ризикнула дарувати людині парфуми, якщо заздалегідь не знала б, що вони їй подобаються. І не є таємницею чи новиною той факт, що наші вподобання  можуть змінюватися протягом життя... можливо якраз тому, що змінюємося ми самі і змінюється наше сприйняття багатьох речей.
Я ніколи не була прихильницею запаху лаванди аж допоки не провела пару тижнів на хорватському узбережжі минулого року. Там все здавалося наче просочене її пахощами, які розносив морський вітерець. Аромат був невід'ємною частиною навколишнього пейзажу і чудово пасував до нього... Незабаром після мого повернення додому, чари розвіялися, але враження все ще залишається сильним і жвавим. Але, оскільки у нас зима, моя лаванда замерзла :-) 
Щоб втілити у прикрасі ідею замерзлої лаванди, я навчилася обплетати ріволі форми наветта, або маркіз. Перше мені більше подобається, бо форма і справді нагадує човник. Я склала коротенький плейлист майстер класі, які можуть стати у пригоді під час тренування. Проблема в тому, що незалежно від кількості майстер класів, вони дають лише загальне уявлення про процес, якщо використовуються інші матеріали (хоча може це і перевага, а не недолік:-))  Мої наветти розміром 7.5 x 15 мм і 17 x 32 мм. А мої амбіції - використати рубку.
(Готові елементи були використані пізніше для виготовлення сережок і намиста)


So for the smaller one start bezeling from stringing 20 cut beads, add 1 peyote row of cut beads and then two rows of 10.0 seed beads missing the two opposite gaps.


Отже, для меншого елементу нанизуємо 20 бісерин рубки, додаємо один пейоточний ряд рубкою і два ряди 10.0 бісером, пропускаємо два проміжки з протилежних боків.


Put the rivoli inside and go on with the back side. Bead with 10.0 seed beads only.


Вкладаємо ріволі всередину і продовжуємо по зворотній стороні, але працюємо лише бісером 10.0.


For the bigger pieces start with stringing 32 cut beads, then add two rows of cut beads without any shortening and then add two rows of 10.0 seed beads missing the two opposite gaps as well.
On the back side work with 10.0 seed beads only.


Для більших елементів, починаємо з набору 32 бісерини рубки, додаємо два ряди рубки без скорочень і потім ще два ряди бісеру 10.0 пропускаючи два проміжки з протилежних боків.
На зворотній стороні працюємо лише бісером 10.0.

22 January 2017

Starry Night Jersey Dress


On some reason I remember one Christmas night well... It was more than several years ago. Me and my friend went to the theatre right on Christmas Day (how we could buy the tickets on that performance is still an unexplained mystery). It was the day of a real snowfall... and as I live far from the centre of the city, to get to the place was quite hard. The roads were not cleaned from the snow, the bus fare became twice or even triple more than on usual days and during all the way I saw a lot of people trying to get on any public transport. Our Christmas is a day when children (mostly with their families) visit their godparents so the moving is pretty busy. Obviously my only thought was how I would get back home. But when I left the theatre, the weather had already changed... I had to get off the bus a little earlier and walked a little longer to get home so could enjoy the beauty of that night. It was so silent around... the snow, that had been falling almost the whole day as huge flakes,  lay quietly in snowdrifts reminding frozen waves. It was so sparkling as if specially lighted with the stars shining... And those stars were so numerous that looked like a heaven firework set to prolong the amazing... I admired the scenery so much and was happy to find myself outdoors at that stunning moment. Probably since then when I hear the expression Christmas night, I see that picture. It can't but inspire...


Сукня "Зоряна ніч"


З певної причини я добре пам'ятаю один Різдвяний вечір... Це було більше ніж декілька років тому. Ми з подругою поїхали до театру якраз в день Різдва (як нам вдалося купити квитки і досі залишається нез'ясованою таємницею). В той день був справжній снігопад... і, оскільки я живу далеко від центру міста, дістатися театру виявилося доволі важко. Дороги від снігу не чистили, проїзд коштував у двічі, а то і тричі, дорожче за звичайні дні і протягом всього шляху я бачила багато людей, які намагалися сісти в будь який громадський транспорт. На наше ж Різдво похресники відвідують своїх хрещених батьків і не самі, а з родинами, тому рух доволі жвавий. Звісно, що мене займало питання, як діставатимуся додому. Але, коли ми вийшли з театру, погода вже змінилися... Мені довелося вийти на зупинку раніше і пройтися трохи довше, щоб дістатися дому, тож я змогла насолодитися красою того вечора. Навкруги було так тихо... Лапатий сніг, який валив цілий день, спокійно лежав у заметах, які нагадували замерзлі хвилі. Він виблискував так яскраво, наче спеціально підсвічений сяянням зірок... А зірок тих було стільки, що здавалося це якийсь небесний феєрверк застиг, щоб подовжити мить захоплення... Я довго милувалася пейзажем і була щаслива, що опинилася на вулиці в той приголомшливий момент. Мабуть з того часу, коли я чую вираз "Різдвяна ніч", я одразу уявляю ту картину. Це не може не надихати...


As I try to be as truthful here as possible, I want to confess at once that this dress pattern #116 from Burda 11/2016  was chosen to be some kind of a showcase for the necklace. At first I didn't like the pattern's very loose front part but then thought such silhouette was perfect for holiday season because one could eat a lot and gained weight wouldn't be seen:-)
Besides, as a rule before the holiday I don't have much time for sewing as well as in the end or the start of the term at school so the simplicity of the pattern had to be balanced with the accessories. So finally I think I made a right choice because even could to diverse the outfit with furry cuffs which look really apposite here. I only chose the wrong bra so be careful with it to have better fitting of the dress.


Оскільки я намагаюся тут бути як найчеснішою, то маю одразу зізнатися, що цю модель сукні №116 з Burda 11/2016 було обрано як таку собі вітрину для намиста. Спочатку мені не дуже сподобалась дуже вільна передня частина моделі, але потім я подумала, що такий силует чудово підходить для святкової пори, тому що можна багато їсти, а набрану вагу не буде видно:-)
Крім того, як правило перед святами, так само як і в кінці або на початку семестру в школі, у мене немає достатньо часу на пошиття, тож простота сукні мала бути врівноважена аксесуарами. Зрештою думаю, я зробила правильний вибір, тому що навіть доповнила вбрання хутряними манжетами, які виглядають тут і справді до ладу.  Я тільки помилилася щодо вибору бра, тож будь з цим уважною, щоб сукня сиділа краще.


The only thing I change here - decreased the neck hole cut on the back. The pattern in the magazine has it very deep. As I am going to wear it to work, I made the cut only 10 cm deep.


Єдине, що я тут змінила, зменшила глибину вирізу на спинці. Оскільки я збираюся носити сукню на роботу, то зробила його лише 10 см.


I also decided to line the dress because my fabric is 100% polyester knits and although it is of good quality, I thought the lining would prevent the dress from electrifying and sticking to the pantyhose.


Також вирішила посадити сукню на підкладку, тому що моя тканина трикотаж з 100% поліестеру і хоча він гарної якості, я подумала, що підкладка певним чином попередить електризацію сукні та її прилипання до колготок.


So I had to cut two facings both for the front and the back parts.
Don't add seam allowance for the centre back.


Тож довелося викроїти і дві обшивки: для переду і для спинки.
По середині спинки припуски швів не додаємо
.


The facing can be sewed to the dress in two ways. Either sew it separately and then sew the lining to it. Or sew the facing to the lining and then process the single details of the back and front lining. I made in the latter way.


Обшивку можна притачати двома способами. Або пришити її до сукні і потім до неї пришити підкладку. Або пришити обшивку до підкладки і потім обробляти передню і задню частину підкладки як єдині деталі.


Generally the sewing takes about half a day, the most important not to be tired and find this half :-) The dress is universal, pairs well with other items of clothes and suits any occasion.


Загалом пошиття займає десь півдня, головне - мати сили  і знайти ці півдня :-) Сукня універсальна, добре комбінується з іншими предметами одягу і годиться до будь якого випадку.

14 January 2017

Triangle Seed Bead Tubular Herringbone, or Silver Rain


Our holiday season goes on and today it is Bazil's Day, or Old Style New Year's Day  (it means New Year's Day by Julian calendar). Luckily it is on Saturday this year. Somebody celebrates it, somebody not much or even ignores but anyway it is pleasant to aware that we still can indulge in relaxing and enjoying the atmosphere of our traditions and the festive decor of our houses. And that surely brightens the mood a lot as well as finishing the project that doesn't betray the expectations :-) 
It is a not quick but simple to bead necklace and it is worth making at any season but right now its chatoyant shine reminds the bunches of narrow silver stripes which we call here "rain". It also reminds a silver serpentine with its smooth and flexibility but snakes are good for other holiday's decor:-)


Джгут ндебеле з трикутного бісеру, або Срібний дощик


Святкова пора у нас триває і сьогодні день Василя, тобто Старий новий рік і нам пощастило, що цього року він припав на суботу. Хтось його святкує, хтось - не дуже, а хтось і зовсім не визнає, але все одно приємно усвідомлювати, що все ще можеш дозволити собі розслабитися та потішитися атмосферою наших традицій та святковим вбранням осель. І це вже напевно покращує настрій так само як і закінчення роботи над проектом, який виправдовує твої сподівання:-)
Це не швидке, але просте у виконанні  намисто і його варто робити у будь яку пору року, але зараз його переливчастий блиск так нагадує наш новорічний  срібний "дощик"! Він також нагадує і срібну змійку своєю гладенькою поверхньою і пластичністю, але ті плазуни - то прикраса вже для іншого свята:-)


The idea to make the rope from triangle seed beads belongs to +Jill Wiseman who shared it in this tutorial.
I chose goldish and blue triangles. 10 g of the seed beads turned out to be enough for the 27 cm of the rope. I wanted to make it long so bought 40 g but beaded until got weary of it so spent about 35 g for 102 cm.


Ідея зробити джгут з трикутного бісеру належить +Jill Wiseman, яка поділилася нею в цьому майстер класі.
Для свого намиста я обрала блакитно-золотаві трикутники. 10 г бісеру виявилося достатньо для джгута 27 см. Але я хотіла зробити його довгим, тож купила 40 г. Плела поки воно не почало мене марудити, тож витратила приблизно 35 г на 102 см.


It is very pleasant to bead and touch and it is very beautiful when wearing. Now I have an idea and wish to make few pendants to match it.


Намисто дуже приємно плести і торкатися і воно дуже красиве, коли вдягаєш. Зараз маю бажання зробити декілька кулонів чи підвісок до нього.

12 January 2017

Half Tila Pendant, or White Tulips Vision


Whatever we do we want to get the result. And we want it to be a quick and good result because then it motivates to go on with our doings. The work for the sake of it doesn't exhaust, saves time and creates the feeling we can do twice more than usual without much efforts. I am not the exception, I like when it goes in this way, too. My excuse - I prefer alternating complex and simple projects, working on own designs and following the ready tutorials. And as for today's project, I even didn't think a lot about its name. I opened the article to the earrings and chose the idea from it:-)


Кулон з половинок тіли, або Видіння білих тюльпанів:-)


Щоб ми не робили, ми завжди хочемо отримати результат, і хочеться, щоб цей результат був швидкий і гарний, тому що тоді він мотивує продовжувати справу. Така робота не виснажує, заощаджує час і створює відчуття, що ми здатні зробити вдвічі більше ніж зазвичай без особливих зусиль. Я - не виключення, мені теж таке подобається. Але маю виправдання, бо полюбляє чергувати прості і складні проекти, роботу над власними ідеями та виконання вже готових зразків. Що стосується цього проекту, то я навіть і нзву не вигадувала, відкрила статтю про сережки і позичила ідею звідти:-)


The pendant is the exact copy of the earring made by Sidonia's tutorial. I had postponed its making only because of the lack of the necessary materials at that moment.
It took a little less than 5 g of half tilas for two earrings and a pendant.
As a base of a necklace, I wanted to use a wire ring but then changed my mind and took the tough chain.


Кулон - копія сережок створених за МК від Sidonia. я відклала його виконання лише через брак необхідних матеріалів.
На сережки та кулон пішло трохи менше 5 г половинок тіли.
Як основу для намиста спочатку збиралася використати кільце з дроту, але потім передумала і взяла грубий ланцюжок.


10 January 2017

Peyote Leaves Brooch, or Night Spark Flower

Beaded peyote leaves are very beautiful elements and I made a bunch of them for this Donut Necklace. But, as I am a fan of cut beads, I couldn't but try to make such leaves of these seed beads. Not to waste the time and the materials for pure experiments it was decided to make a flower brooch. And here it is. Sparkling shining glittering glimmering and whatever else dark blue flower:-)


Брошка з пейоточного листя, або Нічна іскриста квітка

Листя сплетене в техніці пейот дуже гарне і я зробила його цілу купу для цього намиста "Осінній бал". Але, оскільки я велика шанувальниця рубки, то не могла не спробувати зробити таке листя з цих намистин. Щоб не марнувати час і матеріали на чисті експерименти, було вирішено зробити з нього брошку квітку. І ось вона тут. Іскриста, сяюча, блискуча, мерехтлива та ще там якась темно-синя квітка:-)


For making the leaves three colours of cut beads and one colour of 10.0 were used. I had no pattern for changing the hues, alternated them in free order. 
One leave beaded starting with 12 beads, two leaves with nine and two leaves with seven.
After they are ready I decided to embellish them with 10.0 seed beads and 4 mm bicones.


Щоб зробити листя було використано рубку трьох кольорів і 10.0 бісер одного кольору. У мене не було якоїсь певної схеми для зміну кольорів, чергувала їх у вільному порядку.
Один листок сплетений починаючи з 12 бісерин, два - з дев'яти і два - з семи.
Коли вони були готові, вирішила прикрасити їх бісером 10.0 і біконусами 4 мм.


Then sewed the leaves to the brooch base. I also sewed them to each other on the sides. In this way the brooch keeps the shape better.
The middle of the flower is covered with 10.0 seed beads and bicones in fringe technique. There are tons of popular and not much videos on Youtube to learn it.


Потім пришила листя до основи брошки. Також я зшила листя між собою по боковим сторонам, щоб брошка брошка краще тримала форму. 
Середину квітки заповнила бісером 10.0 і 4 мм біконусами в техніці бахрома, або хутро, або корали (в наших МК назви різні, але це все одне і те саме). На Youtube повно популярних і не дуже відео, щоб навчитися цієї техніці.


On the back side of the base I dropped some glue to secure the knots and then joined the cover with a pin.


На зворотну сторону основи додала краплю клею, щоб закріпити вузли і прикріпила частину з застібкою.

6 January 2017

Crocheted Furry Cuffs, or Theatre Dress


Once upon a time when I was a small girl  and only learned to understand what is style and taste, in an old fashion magazine (in direct sense "old" because my childhood belongs to the 70ths and the issue was from the 60ths but in that time I was happy to look through any one) I read an article with the tips as for the dresses being sewed purposely to go to the theatres. Something about how to choose such clothes, what accessory to match and so on. Of course, the article was accompanied with the photos as well and on one of them I saw the outfit with fur cuffs. Probably they impressed me so much that I still remember that picture. Time passed, I grew up, learned to sew and made a lot of clothes both  for myself and for the clients but never used such accessory as furry cuffs for dresses. And recently I have seen the same idea in my Burda's friend Mary Athey's project. My childish admiration arose at once and I decided to apply the idea for one of my next items. What is my logic is hard to say, but not having a dress yet, I've already got the cuffs:-))


Плетені хутряні манжети, або Сукня для театру


Колись давно, коли я була маленькою дівчинкою і лише вчилася розуміти, що таке стиль і смак, в одному старому журналі мод ("старому" в прямому сенсі, тому що моє дитинство належить до 70-х, а журнал був з 60-х, але в ті часи я радo переглядала будь який) я читала статтю з порадами щодо суконь, які шиють спеціально для відвідування театрів. Щось про те, як такий обирати, як підібрати відповідні доповнення і таке інше. Звісно, стаття супроводжувалася світлинами і на одній з них я побачила вбрання з хутряними манжетами. Вірогідно вони мене настільки вразили, що я і досі пам'ятаю те фото. Час минув, я виросла, навчилася шити і створила багато одягу і для себе і для клієнтів, але ніколи не використовувала таке оздоблення як хутряні манжети для сукні. І ось нещодавно я побачила таку саму ідею в проекті моєї подруги по сайту Burda Mary Athey. Моє дитяче захоплення одразу ж воскресло і я вирішила застосувати цю ідею в одному з майбутніх уборів. Якій логіці я підкорилася, важко сказати, але ще не маючи сукні, манжети вже маю:-)


It is very quickly to make. No more than an hour for all the work and I call it a project:-) I decided to crochet the cuffs from furry yarn. Once I crocheted a cape from the alike yarn so knew that three threads is the right choice to get almost real faux fur look. Crocheted a stripes 22 stitches x 7 rows then sewed them.
Obviously I made them not just to play with the yarn and hook. They are meant to be for this dress:-)


Робиться це дуже швидко. Не більше години на всю роботу і  це я називаю проектом:-) Вирішила сплести манжети гачком. Колись плела столу зі схожої пряжі тож, щоб отримати майже справжній вигляд штучного хутра нитку складала в троє. Сплела дві смужки розміром 22 петлі на 7 рядів. Потім зшила їх.
Вочевидь я їх зробила не просто заради вправ з гачком і пряжею. Вони призначені для цієї сукні:-)